
Wet Room Design: What Most People Get Wrong
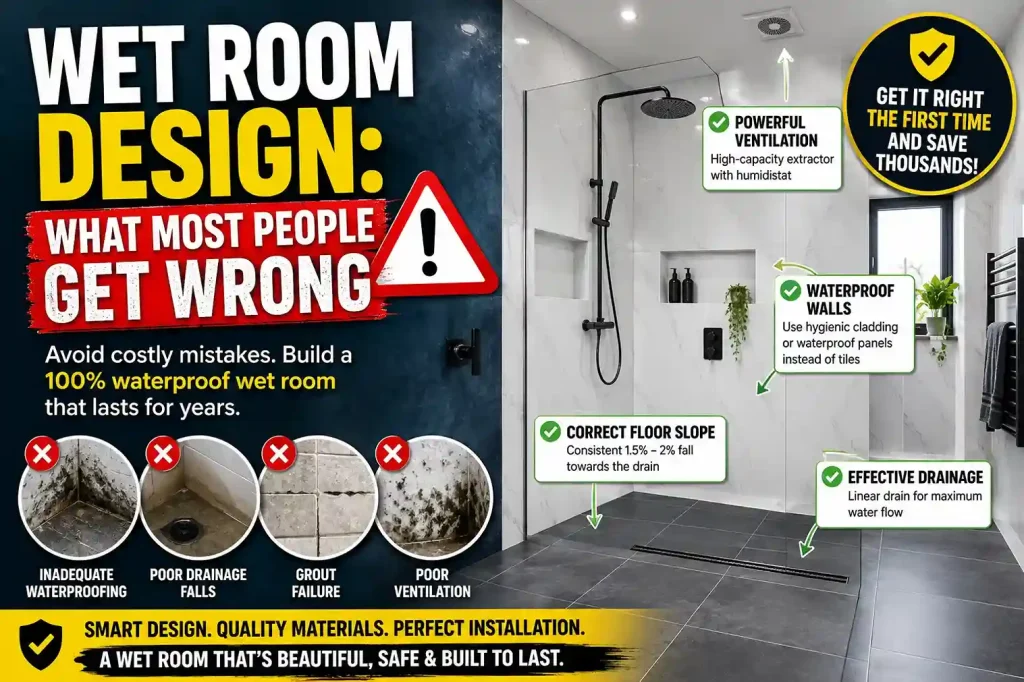
Wet rooms have become one of the most popular bathroom designs in the UK, but many of them are built incorrectly. When a wet room goes wrong, the consequences are expensive and usually involve ripping out the entire space. It is essential to get the technical details right before you buy any fixtures or fittings.
The most common problems include inadequate waterproofing, poor drainage falls, grout failure, and condensation damage to adjacent walls. If you want to avoid these issues, you need to understand where things typically go wrong during the installation. Carry on reading to find out how you can build a durable wet room that stays damp-free.
The Critical Need for Correct Floor Slopes
One of the most technically difficult parts of wet room design is creating the correct fall towards the drain. A flat floor will cause water to pool in corners, while a slope that is too steep makes tiling difficult and is uncomfortable to walk on. You must ensure the floor has a consistent slope of about 1.5% to 2% towards the waste outlet.
Many installers try to create this slope by hand using a sand and cement screed, but this is easy to get wrong. It’s much safer to use a pre-formed wet room tray which comes with the correct slopes already built in. You simply install this tray level with the rest of the floorboards and lay your flooring directly over it.
If you get the slope wrong, water will slowly spread towards the doorway and ruin your carpets. As a result, testing the fall with a spirit level before you lay any floor coverings is a simple step that saves you from a major headache later.
Why Traditional Wall Tiles Fail in Wet Areas
In a wet room, every wall surface gets wet, which makes traditional grouted tiles a risky choice. People often assume that tiles are completely waterproof, but water actually penetrates through cement-based grout over time. Once moisture gets behind the tiles, it rots the plasterboard or timber studwork, leading to loose tiles and structural damp.
To prevent this, you should consider a seamless alternative for your walls. Installing brilliant white hygienic cladding will give you a fully waterproof, grout-free surface that handles constant moisture without degrading. This type of PVC wall cladding eliminates the need for grout entirely, which means there are no cracks or pores where water can seep through. It’s also much easier to clean, as you can simply wipe down the smooth surface with warm soapy water instead of scrubbing mouldy grout lines.
These large panels can fit directly over existing flat surfaces, which reduces prep work. This simple change removes the weakest link in your shower walls and keeps moisture firmly on the surface.
How to Prevent Costly Water Damage
Tanking is the process of applying a liquid waterproof membrane behind your tiles or wall panels. A common mistake is only tanking the immediate shower area instead of the entire room. In a wet room, water splashes everywhere, and steam condenses on every single surface.
This means that you must apply a continuous waterproof barrier across the entire floor and up the walls to a height of at least two metres in the shower zone. Pay close attention to the joints between the walls and the floor, as these are the areas where structural movement is most likely to crack the seal. You can use reinforcing tape over these joints before applying the liquid membrane to ensure the barrier remains flexible.
Solve the Problem of Poor Ventilation
High moisture levels will quickly ruin your wet room if you don’t have adequate ventilation. Many homeowners install a standard extractor fan and assume it will do the job, but these basic models are rarely powerful enough. Without rapid extraction, steam will settle on the ceiling and walls, causing mould to grow on painted surfaces.
Consequently, you need to install a high-capacity extractor fan that runs on a humidistat sensor. This sensor detects moisture levels in the air and keeps the fan running until the room is completely dry, even after you’ve turned off the lights. It’s a simple addition that prevents damp from spreading to adjacent rooms.
Why Smart Design Prevents Costly Wet Room Repairs
Designing a residential wet room requires a strong focus on the invisible details behind the scenes. While selecting beautiful brassware is the fun part, your wet room will only last if the waterproofing, drainage, and ventilation are handled correctly. Skipping steps or buying cheap materials will inevitably lead to leaks and mould.
Taking the time to plan your drainage falls and choosing grout-free wall materials will keep your wet room dry and secure. By avoiding these common mistakes, you can create a practical, stylish bathroom that adds real value to your home.
Note for editor: As per Simply Cladding guidelines, this article has been written with a specific focus on residential wet room design.